
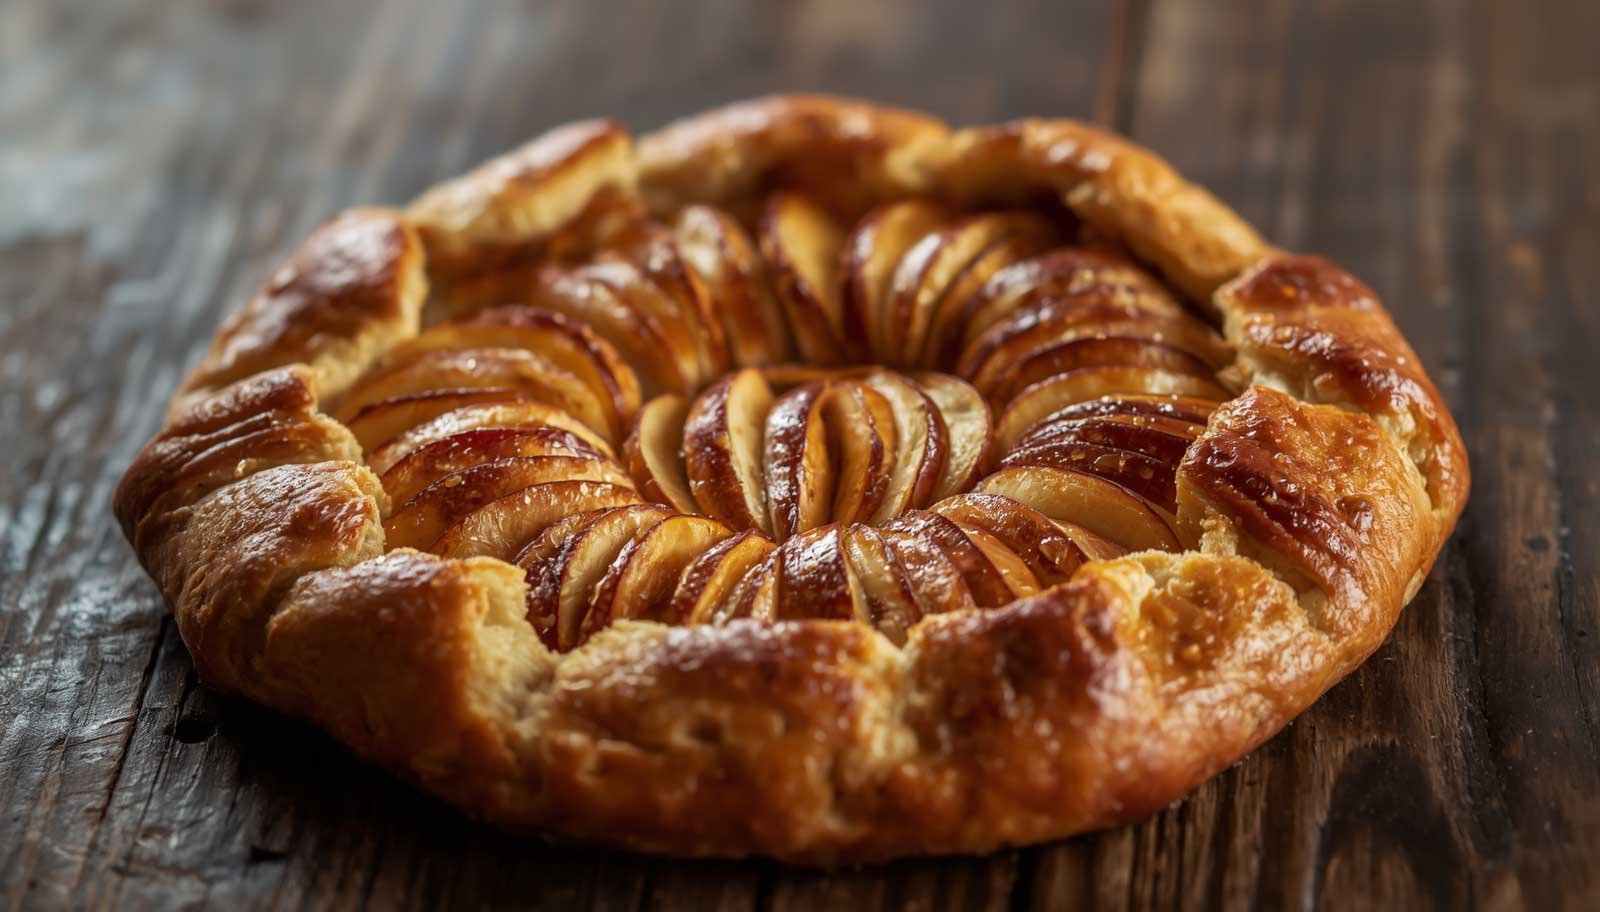
There is something special about a homemade apple dessert baking in the oven on a cool afternoon. The smell of cinnamon, buttery pastry, and sweet apples makes the kitchen feel warm and inviting. This simple apple galette brings all those cozy flavors together without the extra work of making a traditional pie.
An apple galette is a rustic, free-form tart made with a flaky pastry crust and a generous filling of sliced apples. Instead of carefully shaping the dough in a pie dish, you simply fold the edges over the fruit and bake it on a sheet pan. The finished dessert looks beautifully homemade, with golden pastry, tender apples, and lightly caramelized edges.
This recipe uses everyday ingredients and a straightforward method, making it a lovely choice for beginner bakers. You can prepare the crust from scratch, use your favorite apples, and serve the galette warm with vanilla ice cream or a spoonful of whipped cream.
Why You’ll Love This Apple Galette
Simple, rustic baking: There is no need to worry about perfect edges or a complicated pie crust. The uneven folds are part of the galette’s charm.
A flaky homemade crust: Cold butter creates little pockets in the pastry that become crisp and tender as the galette bakes.
Sweet, cinnamon-spiced apples: A little sugar, cinnamon, and lemon juice bring out the natural flavor of the fruit without making the filling overly sweet.
Easy to customize: Use different apple varieties, add chopped nuts, or try a pinch of nutmeg for a slightly different flavor.
Perfect for any occasion: Serve it for a weekend dessert, a family gathering, or a relaxed afternoon with coffee or tea.
Ingredients You’ll Need
For the Homemade Crust
- All-purpose flour: Forms the base of the pastry. Measure it carefully so the crust stays tender rather than dry.
- Cold unsalted butter: The key to a flaky crust. Cut it into small cubes and keep it cold until you’re ready to mix.
- Granulated sugar: Adds a little sweetness to the pastry and helps it develop a golden color.
- Salt: Balances the sweetness and brings out the buttery flavor.
- Ice water: Helps the dough come together. Add it gradually so the pastry doesn’t become sticky.
- Egg wash: One beaten egg brushed over the crust gives it a glossy, golden finish. A little milk can be used instead.
For the Apple Filling
- Apples: Choose firm apples that hold their shape during baking. Granny Smith, Honeycrisp, Pink Lady, or Braeburn are good options.
- Granulated sugar: Sweetens the filling while allowing the apple flavor to shine.
- Ground cinnamon: Adds classic warm spice that pairs naturally with apples.
- Lemon juice: Brightens the flavor and helps prevent the sliced apples from browning before baking.
- Cornstarch: Absorbs some of the juices released by the fruit, helping prevent a watery filling.
- Butter: A few small pieces placed over the apples add richness as they bake.
- Coarse sugar, optional: Sprinkled over the crust before baking for a delicate crunch.
How to Make a Simple Apple Galette
Step 1: Make the Pastry Dough
Add the flour, sugar, and salt to a large mixing bowl and stir to combine. Add the cold butter cubes and work them into the flour with a pastry cutter or your fingertips.
Stop when the mixture resembles coarse crumbs with some small, pea-sized pieces of butter still visible. Those pieces help create flaky layers in the finished crust.
Add the ice water one tablespoon at a time, gently mixing until the dough begins to hold together when pressed. You may not need all the water, so avoid adding it all at once.
Shape the dough into a flat disc, wrap it, and refrigerate for at least 30 minutes. Chilling makes the dough easier to roll and helps the butter stay firm.
Step 2: Prepare the Apples
Peel the apples if you prefer a softer, more delicate filling, or leave the skins on for a more rustic look. Remove the cores and slice the apples thinly and evenly.
Place the slices in a bowl and toss them with the sugar, cinnamon, lemon juice, and cornstarch. Make sure the apples are coated evenly so the filling has a balanced flavor and the juices thicken as the galette bakes.
If the apples release a lot of liquid while sitting, leave the excess liquid in the bowl rather than pouring it onto the pastry.
Step 3: Roll Out the Crust
Preheat your oven to 400°F (200°C). Line a large baking sheet with parchment paper.
Lightly flour your work surface and rolling pin. Roll the chilled dough into a rough circle about 12 inches across and approximately 1/8 inch thick. It doesn’t need to be perfectly round.
Transfer the dough carefully to the prepared baking sheet. If it softens while you’re working, place it in the refrigerator for a few minutes before adding the filling.
Step 4: Add the Apple Filling
Arrange the apple slices over the center of the dough, leaving a border of about 2 inches around the edges. You can overlap the slices in neat circles or arrange them more casually.
Try to spread the apples in an even layer rather than piling them too high. This helps the fruit cook evenly and makes the pastry easier to fold.
Dot the apples with the small pieces of butter for extra richness.
Step 5: Fold the Edges
Fold the uncovered edges of the pastry up and over the apples, working around the circle in sections. Let the dough overlap naturally as you go.
The center should remain open so the apples are visible. Gently press the folds together to help them hold their shape.
Brush the pastry with beaten egg, then sprinkle coarse sugar over the edges if you like. This gives the crust a beautiful golden color and a lightly crisp finish.
Step 6: Bake Until Golden
Bake for 35 to 45 minutes, or until the crust is golden brown and the apples are tender. The filling should be bubbling gently, and the bottom of the pastry should look cooked rather than pale or doughy.
If the edges begin browning too quickly, loosely cover them with foil for the remaining baking time.
Remove the galette from the oven and let it rest on the baking sheet for at least 15 minutes. This allows the filling to settle and makes it easier to slice without losing too much juice.
Step 7: Slice and Serve
Transfer the galette to a serving board or platter if desired. Slice it into wedges and serve warm or at room temperature.
For an extra-special dessert, add a scoop of vanilla ice cream, a spoonful of whipped cream, or a light drizzle of caramel sauce. The contrast between the crisp pastry, soft apples, and creamy topping makes every bite feel comforting.
Tips for the Flakiest Homemade Crust
Keep the butter cold. Warm butter blends too thoroughly into the flour, which can make the pastry less flaky. If the dough becomes soft at any point, chill it before continuing.
Avoid overworking the dough. Mix only until the dough holds together. Too much handling can develop the gluten in the flour and create a tougher crust.
Add water gradually. The dough should be moist enough to hold together but not sticky. Different flours and kitchen conditions can affect how much water you need.
Don’t skip chilling. Resting the dough in the refrigerator relaxes the gluten and firms the butter, making rolling easier.
Slice the apples evenly. Thin, uniform slices cook more consistently and are easier to arrange on the pastry.
Use parchment paper. Apple juices and sugar can caramelize on the baking sheet. Parchment makes cleanup easier and helps prevent sticking.
Best Apples for a Galette
The best apples are firm enough to hold their shape but tender enough to soften during baking.
- Granny Smith: Tart and firm, making them ideal if you prefer a less-sweet filling.
- Honeycrisp: Sweet, juicy, and pleasantly crisp, with a balanced apple flavor.
- Pink Lady: A good sweet-tart option that generally holds up well in the oven.
- Braeburn: Offers a warm, slightly spicy flavor and a firm texture.
You can also combine two varieties. For example, Granny Smith apples paired with Honeycrisp create a nice balance of tartness and sweetness. If your apples are especially sweet, reduce the sugar slightly to suit your taste.
Easy Variations to Try
Apple Pear Galette
Replace half of the apples with thinly sliced ripe but firm pears. The pears add a delicate sweetness and pair beautifully with cinnamon.
Apple Galette with Pecans
Sprinkle a small handful of chopped pecans over the apples before folding the crust. They add a pleasant crunch and a nutty flavor.
Maple Cinnamon Apple Galette
Replace part of the granulated sugar in the filling with a little maple syrup. Use it sparingly because extra liquid can make the filling wetter.
Apple Galette with Brown Sugar
Use light brown sugar in place of granulated sugar for a deeper, caramel-like flavor. A small pinch of nutmeg also works well.
Almond Apple Galette
Spread a thin layer of almond flour mixed with a little sugar over the center of the rolled pastry before adding the apples. This can help absorb fruit juices and adds a subtle nutty taste. Avoid using too much, or the filling may become dry.
What to Serve with Apple Galette
This dessert is delicious on its own, but a simple topping can make it even better.
- Vanilla ice cream: The classic choice, especially when the galette is still slightly warm.
- Fresh whipped cream: Light and creamy without overpowering the apples.
- Caramel sauce: Adds a rich sweetness that works particularly well with tart apples.
- Greek yogurt: A less-sweet option for a casual brunch or afternoon treat.
- Coffee or tea: A warm drink makes a slice of apple galette feel like the perfect afternoon snack.
For a dinner party, serve the galette slightly warm with ice cream and a small drizzle of caramel. For an everyday dessert, a plain slice with coffee is more than enough.
How to Store Apple Galette
Let the galette cool completely before storing it.
At room temperature: If serving within the same day, keep it covered in a cool place for a few hours. For longer storage, refrigeration is the safer option because the filling contains moist fruit.
In the refrigerator: Store leftovers in an airtight container or cover the galette well. Refrigerate for up to 3 days.
To reheat: Place individual slices in a 350°F (175°C) oven for about 8 to 12 minutes, or until warmed through. An air fryer can also help crisp the pastry. The microwave works for a quick warm-up, but the crust will be softer.
To freeze: Freeze the fully baked and cooled galette, well wrapped, for up to 2 months for best quality. Thaw it in the refrigerator and reheat in the oven to restore some of the crispness.
Simple Apple Galette with Flaky Homemade Crust
Ingredients
7 itemsInstructions
9 steps-
01
Combine the flour, sugar, and salt in a bowl. Cut in the cold butter until the mixture resembles coarse crumbs with some pea-sized pieces remaining.
-
02
Add ice water one tablespoon at a time, mixing gently until the dough holds together when pressed. Shape into a disc, wrap, and refrigerate for 30 minutes.
-
03
Preheat the oven to 400°F (200°C). Line a baking sheet with parchment paper.
-
04
Core and thinly slice the apples. Toss them with the sugar, cinnamon, lemon juice, and cornstarch.
-
05
Roll the chilled dough into a roughly 12-inch circle on a lightly floured surface. Transfer it to the prepared baking sheet.
-
06
Arrange the apple slices in the center, leaving about a 2-inch border around the edges. Dot the apples with the small pieces of butter.
-
07
Fold the pastry edges over the apples, overlapping the dough as needed. Brush the crust with beaten egg and sprinkle with coarse sugar if using.
-
08
Bake for 35–45 minutes, until the crust is golden and the apples are tender and bubbling.
-
09
Cool on the baking sheet for at least 15 minutes before slicing. Serve warm or at room temperature with ice cream or whipped cream.
Chef's Notes & Tips
- Keep the butter cold for the flakiest pastry.
- Add only enough water to bring the dough together.
- Use firm apples that hold their shape during baking.
- If the pastry browns too quickly, cover the edges loosely with foil.
- Store leftovers covered in the refrigerator for up to 3 days.


1 thought on “Simple Apple Galette with Flaky Homemade Crust”