
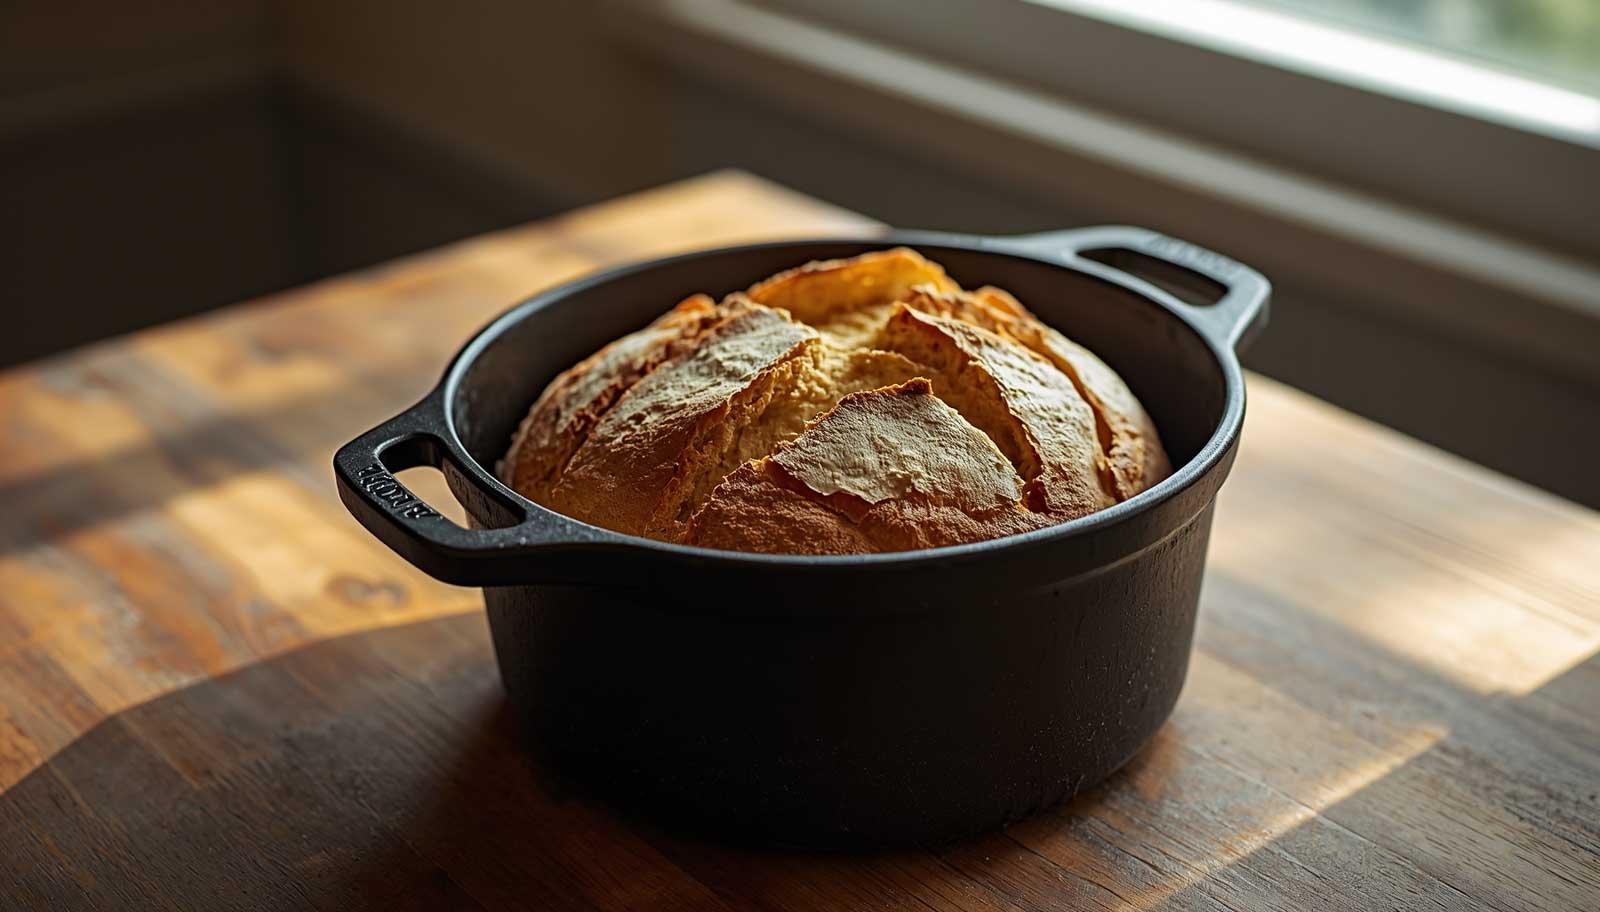
There is nothing quite like pulling a fresh loaf of sourdough bread out of the oven. The crust is golden and crackly, the inside is soft and chewy, and the whole kitchen smells like a little bakery. If you have always wanted to make sourdough at home but felt intimidated by the process, this no-knead sourdough bread is a great place to start.
You do not need a stand mixer or any special kneading technique. Most of the work happens while the dough rests, giving the natural fermentation time to develop flavor and texture. A little patience is all you need.
A cast iron Dutch oven makes this recipe especially beginner-friendly. It traps steam around the dough during the first part of baking, helping the loaf rise and develop a crisp crust. Once the lid comes off, the bread turns a beautiful golden brown.
This recipe does take time, but the actual hands-on work is minimal. You can mix the dough in the evening, let it ferment, and bake it the following day when it fits your schedule.
What Makes No-Knead Sourdough Different?
Traditional bread recipes often ask you to knead the dough until it becomes smooth and elastic. No-knead sourdough takes a different approach. Instead of working the dough by hand, you allow time and fermentation to develop its structure.
The sourdough starter contains naturally occurring yeast and bacteria. As the dough ferments, it develops flavor and produces the gases that help the bread rise.
The result is a loaf with a crisp crust, a chewy center, and a gentle tangy flavor. It may not look perfect the first time, and that is completely normal. Sourdough is influenced by room temperature, flour, starter strength, and the amount of time the dough ferments.
Ingredients You Will Need
You only need four basic ingredients to make this bread.
Bread flour: Bread flour contains enough protein to help develop a strong dough structure. All-purpose flour can also work, although the loaf may be a little less chewy.
Active sourdough starter: Your starter should be bubbly, active, and recently fed. It should show clear signs of fermentation before you mix it into the dough.
Water: Room-temperature water is a good starting point. If your kitchen is particularly warm, slightly cooler water can help slow fermentation.
Salt: Salt improves the flavor of the bread and helps regulate fermentation. Fine sea salt or regular table salt works well.
You do not need commercial yeast for this recipe. The sourdough starter provides the leavening.
How to Know Your Sourdough Starter Is Ready
A healthy starter is one of the most important parts of sourdough baking. If your starter is weak or inactive, the dough may take a long time to rise and produce a dense loaf.
Feed your starter according to your usual routine and wait until it becomes bubbly and noticeably rises. Many starters reach their peak several hours after feeding, but the timing depends on temperature and feeding ratio.
If your starter smells pleasantly tangy and has plenty of bubbles, that is usually a good sign. A starter that has just been taken from the refrigerator may need a feeding or two before it is ready to bake with.
For beginners, it helps to use a starter that has been rising consistently for several days.
How to Make Beginner’s No-Knead Sourdough Bread
Step 1: Mix the Dough
Add the water and active sourdough starter to a large mixing bowl. Stir until the starter is mostly dispersed in the water.
Add the bread flour and salt. Mix everything with a wooden spoon or your hands until no dry patches of flour remain.
The dough will look rough, sticky, and a little shaggy. That is exactly what you want. There is no need to knead it or try to make it perfectly smooth.
Cover the bowl and let the dough rest for about 30 minutes.
Step 2: Let the Dough Ferment
After the initial rest, leave the dough covered at room temperature while fermentation begins.
If you like, you can perform two or three gentle sets of stretch-and-folds during the first couple of hours. To do this, pull one side of the dough upward and fold it over the center. Turn the bowl and repeat a few times.
This step is optional, but it can help the dough develop strength without traditional kneading.
Allow the dough to continue fermenting until it looks noticeably puffier and has increased in volume. You may see bubbles along the sides or on the surface.
The timing depends on your starter and kitchen temperature. In a warm kitchen, fermentation may move quickly. In a cool kitchen, it can take much longer. Watch the dough rather than relying entirely on the clock.
Step 3: Shape the Loaf
Lightly flour your work surface and gently turn the dough out of the bowl.
Bring the edges toward the center, then turn the dough over so the smoother side faces up. Gently pull it toward you across the counter to create a little surface tension.
Try not to add too much flour or press out all the air. The goal is to create a round loaf while keeping as much of the dough’s structure as possible.
Let it rest for a few minutes if it feels difficult to handle.
Step 4: Final Proof
Place the shaped dough seam-side up in a well-floured proofing basket or a bowl lined with a clean, floured kitchen towel.
Cover it and allow it to proof until it looks slightly puffy. Depending on your schedule and the dough’s condition, you can proof it at room temperature or refrigerate it for several hours or overnight.
Cold proofing makes the dough easier to handle and can add flavor, but it is not essential for a good loaf.
If the dough spreads excessively or becomes very slack, it may have fermented too long. Learning to recognize the right stage takes practice.
Step 5: Preheat the Dutch Oven
Place your cast iron Dutch oven, including its lid, in the oven. Preheat to 450°F (232°C) for about 30 to 45 minutes.
Make sure your Dutch oven and lid are rated for this temperature. Use oven mitts whenever you handle the hot pot.
While the oven heats, prepare a piece of parchment paper large enough to lift the dough safely into the pot.
Step 6: Score and Bake
Carefully turn the dough onto the parchment paper so the smooth side faces up.
Use a sharp bread lame or a clean, very sharp knife to make one confident slash across the top. This gives the loaf room to expand in the oven.
Carefully remove the hot Dutch oven and lower the dough into it using the parchment paper. Put the lid back on and return the pot to the oven.
Bake covered for 25 minutes. The trapped steam helps the loaf expand and develop a good crust.
Remove the lid and continue baking for another 15 to 20 minutes, until the crust is deeply golden brown.
If the loaf still looks pale, give it a few extra minutes. A darker crust usually brings more flavor.
Step 7: Let the Bread Cool
Remove the bread from the Dutch oven and place it on a wire rack.
This is the hardest part for many beginners, but let the loaf cool for at least one hour before slicing. The inside continues to set as it cools, and cutting it too early can leave the crumb gummy.
Once cooled, slice it with a serrated bread knife and enjoy.
Tips for Better Sourdough Bread
Use a kitchen scale. Measuring flour and water by weight gives you much more consistent results than using cups. Sourdough dough can be sensitive to small changes in hydration.
Do not rush fermentation. The dough needs enough time to develop gas and flavor. A fixed number of hours is not always reliable because temperature and starter activity vary.
Start with moderate hydration. Very wet dough can be difficult to shape when you are learning. This recipe uses a manageable amount of water for a first loaf.
Keep your hands slightly wet. Wet hands make sticky dough easier to handle during mixing and folding.
Preheat the Dutch oven properly. A thoroughly heated pot helps the bread rise well and encourages a crisp crust.
Let the loaf cool completely. Cutting too soon can make even a well-baked loaf seem underdone inside.
Common Sourdough Problems and How to Fix Them
Why Is My Bread Dense?
Dense bread often means the dough did not ferment enough, the starter was not active, or the dough lost too much of its structure. Make sure your starter rises reliably after feeding and give the dough enough time to become airy before shaping.
Why Did My Dough Spread Out?
A dough that spreads too much may be over-fermented, too wet for the flour you used, or not shaped with enough surface tension. Try shortening fermentation slightly and handle the dough gently but confidently during shaping.
Why Is the Inside Gummy?
Gummy bread can happen when the loaf is underbaked or sliced while still warm. Bake until the crust is deeply colored and allow the bread to cool fully before cutting.
Why Is My Crust Too Hard?
A thick, hard crust can develop if the loaf is baked for too long or at a temperature that is too high for your oven. Keep the lid on for the first 25 minutes, then watch the crust carefully during the uncovered stage.
How to Store Homemade Sourdough Bread
Once the loaf has cooled completely, store it cut-side down on a cutting board for short-term storage, or place it in a bread bag or paper bag. The crust will gradually soften as the bread sits.
For longer storage, slice the bread and freeze it in a freezer-safe bag. You can toast slices directly from frozen or let them thaw at room temperature.
Avoid refrigerating homemade bread because it can become stale more quickly.
What to Serve With Sourdough Bread
Fresh sourdough is wonderful with salted butter, jam, honey, or a drizzle of olive oil. The tangy flavor also pairs well with scrambled eggs, avocado, soups, and hearty stews.
You can use leftover slices to make grilled cheese sandwiches, garlic toast, or homemade croutons. Slightly stale sourdough also makes excellent French toast.
A Simple Loaf to Build Your Confidence
Making sourdough bread is a skill that gets easier with practice. Your first loaf might not have the big holes or dramatic rise you see in bakery photos, and that is fine. Each bake teaches you a little more about your starter, your flour, and how dough behaves in your kitchen.
This beginner’s no-knead sourdough bread is a simple way to get started. With four basic ingredients, a little patience, and a hot cast iron Dutch oven, you can make a beautiful homemade loaf with a crisp crust and a soft, chewy center.
Beginner’s No-Knead Sourdough Bread with a Cast Iron Dutch Oven
Ingredients
5 itemsInstructions
12 steps-
01
Combine the water and active sourdough starter in a large bowl. Stir to disperse the starter.
-
02
Add the bread flour and salt. Mix until no dry flour remains. The dough will look sticky and rough.
-
03
Cover and let the dough rest for 30 minutes.
-
04
If desired, perform two or three sets of gentle stretch-and-folds during the first two hours of fermentation.
-
05
Continue fermenting at room temperature until the dough looks puffier, shows bubbles, and has increased noticeably in volume. The timing will depend on the starter and room temperature.
-
06
Lightly flour a work surface. Turn out the dough and shape it into a round loaf.
-
07
Place the dough seam-side up in a floured proofing basket or towel-lined bowl. Cover and proof until slightly puffy, or refrigerate for several hours or overnight.
-
08
Place a cast iron Dutch oven with its lid in the oven. Preheat to 450°F (232°C) for 30 to 45 minutes.
-
09
Turn the dough onto parchment paper, score the top with a sharp blade, and carefully lower it into the hot Dutch oven.
-
10
Cover and bake for 25 minutes.
-
11
Remove the lid and bake for another 15 to 20 minutes, until the crust is deeply golden brown.
-
12
Transfer the loaf to a wire rack and cool for at least one hour before slicing.
Chef's Notes & Tips
- Use an active starter that rises consistently after feeding.
- Fermentation times are estimates. Follow the dough’s appearance and texture rather than the clock alone.
- A kitchen scale gives the most consistent results.
- Store cooled bread in a bread bag or freeze sliced portions for longer storage.
- Always use oven mitts when handling a preheated Dutch oven.