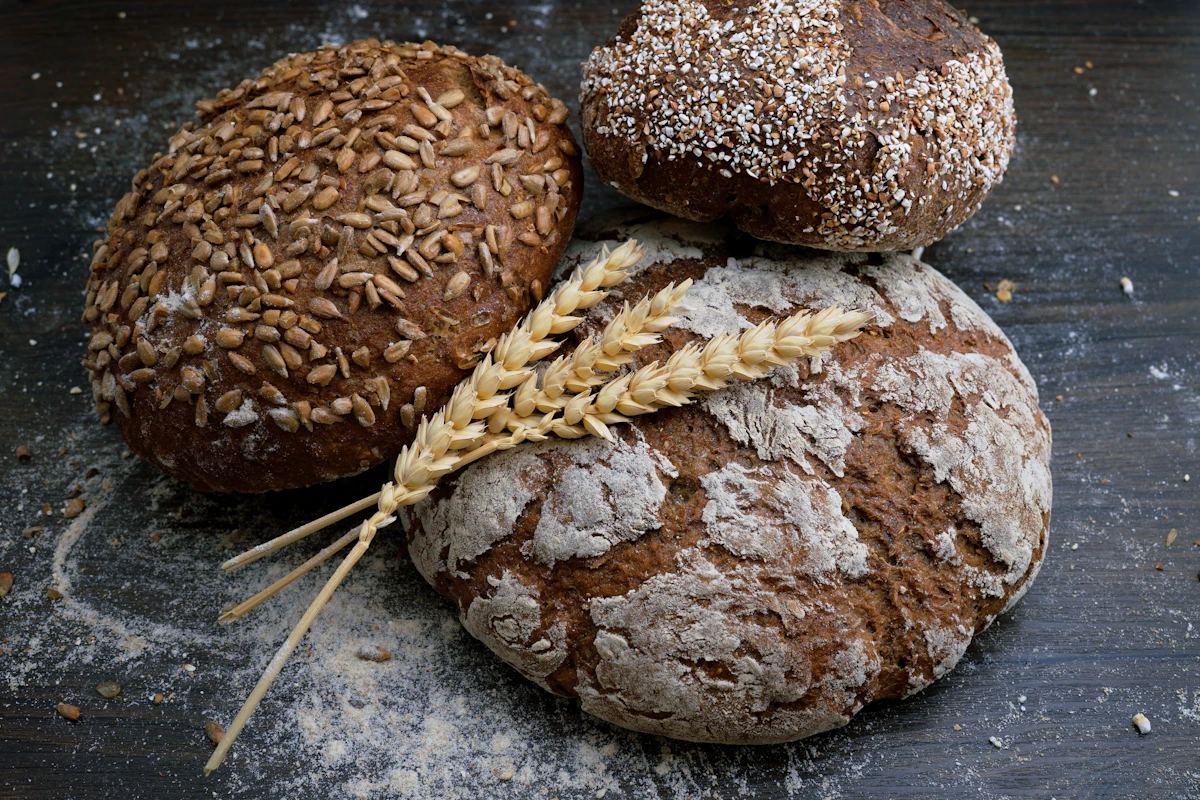
There is a primeval, deeply satisfying alchemy in baking your own bread. Taking four simple, humble pantry ingredients—flour, water, salt, and yeast—and watching them transform into a towering, golden-amber boule with a blistered, crackling crust and an airy, custardy crumb is one of the greatest accomplishments in home cooking. And yet for years, amateur bakers struggled to recreate the blistered crusts of European bakeries, thwarted by dry home ovens that let steam escape.
The game-changing revelation in modern bread baking is the heavy enameled cast-iron Dutch oven. A preheated Dutch oven acts as a sealed commercial steam oven in miniature. As the high-hydration dough bakes inside the closed pot, its evaporating moisture creates an intense steam bath that keeps the dough surface supple, allowing the loaf to expand to maximum height (the coveted “oven spring”) while gelatinizing starches on the crust. When the lid is removed for the final twenty minutes, that moist crust bakes into a shatteringly crisp, blistered mahogany shell. Best of all, this recipe requires zero kneading, coming together with just a few stirs and a slow overnight fermentation.
Why You’ll Love This Artisan Bread
This no-knead Dutch oven method makes artisanal bread baking effortless and reliable:
- Zero Kneading Required: Time does all the heavy gluten development work for you during a relaxed 12- to 18-hour room-temperature fermentation.
- Crackling Bakery Crust: Trapped steam inside the cast iron creates thin, blistered, singing crusts that shatter when sliced.
- Open, Custardy Crumb: High hydration produces an open, honeycomb crumb that is chewy, moist, and tender.
- Complex Fermented Flavor: Slow fermentation gives commercial yeast the time to develop rich, complex, sourdough-like flavor notes without needing a live starter.
- Inexpensive & Pure: Free from preservatives, dough conditioners, and palm oil found in store-bought sandwich breads.
Ingredients You’ll Need
With only four ingredients, ingredient quality and accurate measuring are paramount.
The Four Staples
- Bread Flour: Three and a quarter cups (about 420g) of unbleached bread flour. Bread flour has a higher protein content (12.7% to 14%) than all-purpose flour, providing the elastic gluten network needed to trap rising gas bubbles into tall, airy boules.
- Instant Yeast (or Active Dry): Half a teaspoon of instant yeast. A tiny pinch of yeast allows the dough to ferment slowly overnight, developing superior flavor.
- Fine Sea Salt or Kosher Salt: Two teaspoons (about 10g) of salt. Salt strengthens gluten bonds and is essential for rich bread flavor; never reduce the salt.
- Lukewarm Water: One and a half cups (about 360ml / 360g) of lukewarm filtered water (approx. 85°F to 90°F / 30°C).
How to Make Artisan Bread in a Dutch Oven
Follow these foolproof steps for bakery-worthy bread on your first attempt.
Step 1: Mix the Shaggy Dough (5 Minutes)
In a large mixing bowl, whisk together the bread flour, salt, and instant yeast until thoroughly combined. Pour in the lukewarm water. Using a wooden spoon or Danish dough whisk, stir until all the flour is hydrated and a rough, shaggy, sticky dough forms with no dry flour remaining at the bottom of the bowl. (The dough will look loose and messy; do not be tempted to add more flour!).
Step 2: The Slow Overnight Rise (12 to 18 Hours)
Cover the bowl tightly with plastic wrap or a damp kitchen towel. Place the bowl in a draft-free corner of your kitchen at room temperature (around 68°F to 72°F) for 12 to 18 hours. As the yeast ferments, the dough will more than double in volume, flattening on top and becoming dotted with hundreds of bubbling surface craters. It will smell delightfully fermented, yeasty, and slightly sweet.
Step 3: Shape the Boule
Lightly flour a piece of parchment paper. Use a silicone spatula to gently scrape the sticky dough out of the bowl onto the parchment. With floured hands, gently pull the outer edges of the dough toward the center, folding it over itself three or four times to create a round ball with surface tension. Flip the dough over so the smooth seam-free side faces up. Dust the top lightly with flour. Let the shaped loaf rest uncovered on the parchment paper for 30 minutes while the oven preheats.
Step 4: Preheat the Dutch Oven Screaming Hot
While the dough rests, place a 5- to 6-quart enameled cast-iron Dutch oven with its heavy lid on into your oven. Preheat the oven to 450°F (230°C) for at least 30 minutes. Crucial Rule: The Dutch oven must be blazing hot before the dough enters; this creates instantaneous steam and explosive oven spring.
Step 5: Score the Dough
Using a sharp baker’s lame or razor blade held at a 45-degree angle, make one confident 1/2-inch deep slash across the top of the boule (or a cross). Scoring controls where the bread expands as it bakes, creating a gorgeous “ear” and rustic crust opening.
Step 6: Bake Covered for Steam (30 Minutes)
Carefully remove the scorching hot Dutch oven from the oven using heavy-duty oven mitts and set it on your stovetop. Remove the lid. Pick up the dough by holding the corners of the parchment paper sling and lower the parchment and dough directly into the center of the hot pot. Put the lid back on immediately to trap the steam. Return the pot to the oven and bake at 450°F for 30 minutes.
Step 7: Uncover for the Golden Crust (15 to 20 Minutes)
Carefully remove the lid of the Dutch oven. You will see a pale, dramatically puffed loaf! Return the uncovered pot to the oven and bake for an additional 15 to 20 minutes. As the trapped moisture clears, the crust will turn a deep, blistered golden-mahogany color. The loaf is done when tapping the bottom produces a clear, hollow sound (or an internal thermometer reads 205°F to 210°F).
Step 8: The Cool Down (Don’t Cut Yet!)
Using the parchment sling, lift the loaf out of the pot and transfer it to a wire cooling rack. Listen closely: you will hear the crust singing—a delicate crackling sound as steam escapes through the cooling crust. Allow the bread to cool completely for at least 1 hour before slicing. Slicing warm bread causes internal steam to condense, turning the airy crumb into gummy dough.
Tips for Artisan Bread Mastery
- Use Bread Flour: All-purpose flour will still work, but bread flour produces significantly taller, airier loaves with better chew due to its higher protein content.
- Parchment Paper Sling: Trying to drop dough into a 450°F Dutch oven with your bare hands is dangerous. The parchment paper acts as a safe, heat-proof sling that transfers directly into the pot.
- Don’t Rush the Cool Down: Starch retrogradation continues for an hour after the bread leaves the oven. Cutting into a hot loaf ruins the internal crumb texture.
Dutch Oven Artisan Bread
Ingredients
5 itemsInstructions
8 steps-
01
In a large bowl, whisk flour, salt, and yeast. Add lukewarm water and stir until a sticky, shaggy dough forms without dry spots.
-
02
Cover tightly with plastic wrap; let rise at room temperature (68-72°F) for 12 to 18 hours until doubled in size and bubbly.
-
03
Scrape dough onto floured parchment paper. Fold edges into center to form a round ball; flip seam-side down. Rest 30 minutes.
-
04
Preheat oven to 450°F (230°C) with a 5-6 quart Dutch oven and lid inside for 30 minutes.
-
05
Score top of dough with a razor blade 1/2-inch deep.
-
06
Carefully lower dough on parchment into hot Dutch oven. Cover with lid; bake for 30 minutes.
-
07
Remove lid and bake uncovered for 15 to 20 minutes until crust is deep golden mahogany.
-
08
Transfer loaf to a wire rack. Cool completely for at least 1 hour before slicing.