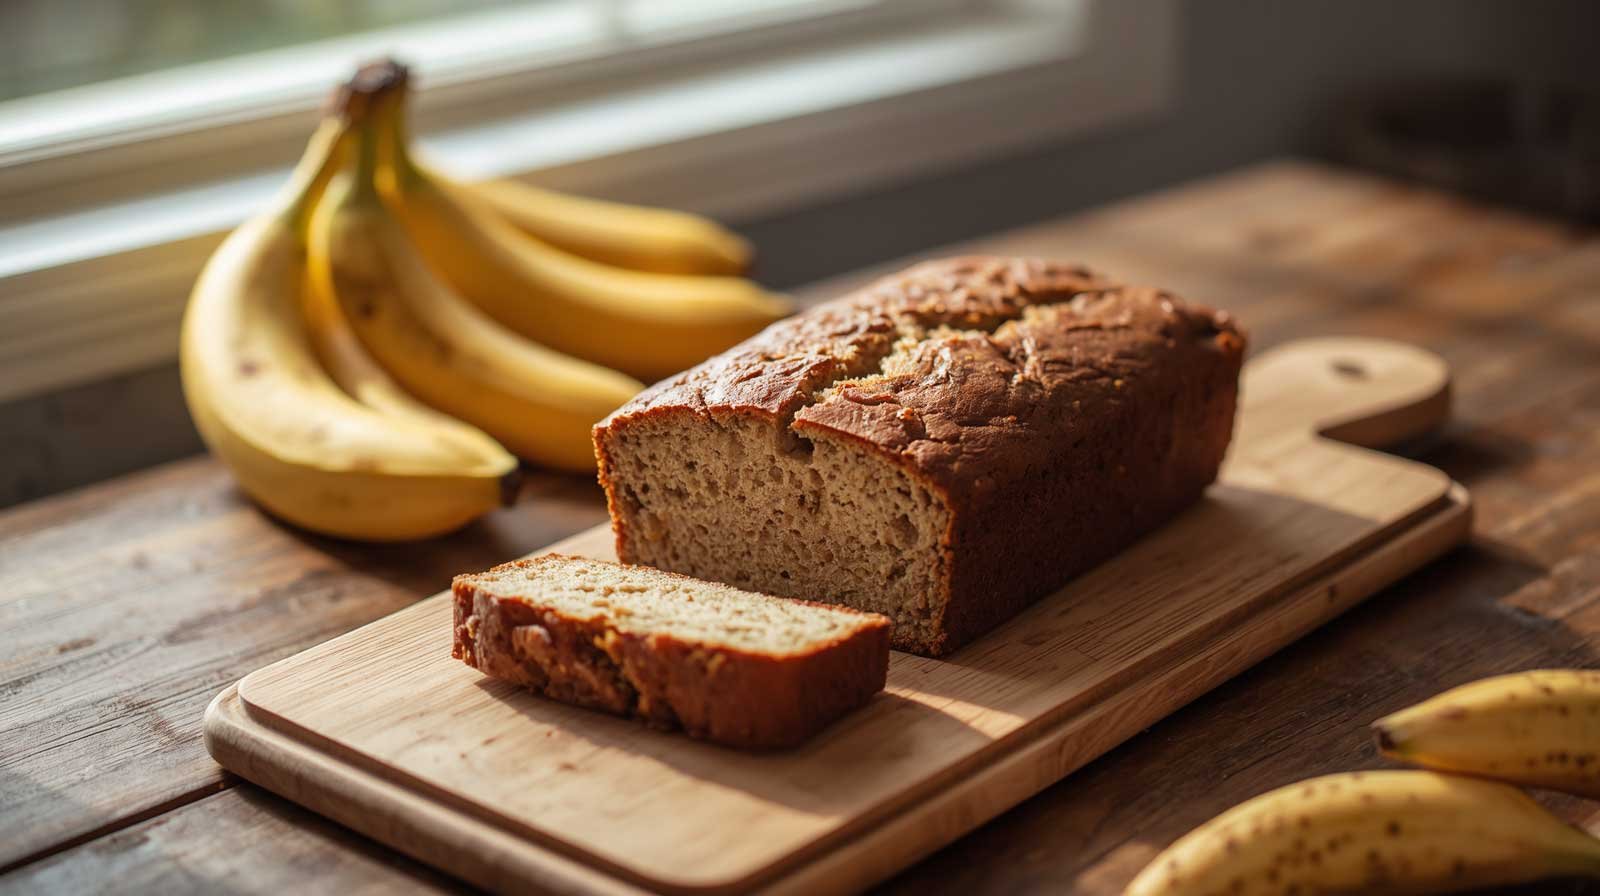
There is nothing quite like a warm slice of homemade banana bread, especially when it has a golden crust, a soft center, and just the right amount of sweetness. But if you’ve ever baked gluten-free banana bread that turned out crumbly, gritty, or disappointingly dry, you know that getting the texture right can be a challenge.
The good news is that gluten-free banana bread can be just as moist and tender as the traditional version. The secret is choosing the right flour, using genuinely ripe bananas, balancing the moisture in the batter, and giving the loaf enough time to set without overbaking it.
In this guide, we’ll explore three approaches to gluten-free banana bread: a reliable all-purpose gluten-free flour version, a naturally nutty almond flour variation, and an oat flour option with a soft, hearty texture. Each approach has its own strengths, so you can choose the one that best suits your pantry and preferences.
Whether you’re baking for someone with celiac disease, avoiding gluten for personal reasons, or simply looking for a new way to use overripe bananas, this recipe guide will help you make a loaf worth baking again.
Why Gluten-Free Banana Bread Often Turns Out Dry
Traditional banana bread relies on wheat flour for structure. Wheat contains gluten-forming proteins that help trap air and give baked goods their familiar elasticity.
Gluten-free flours behave differently. Rice flour, almond flour, oat flour, and starch-based blends absorb moisture in different ways and provide different amounts of structure. Simply replacing wheat flour with one of these ingredients can lead to disappointing results.
Here are the most common reasons gluten-free banana bread becomes dry or crumbly.
1. Using the Wrong Gluten-Free Flour
Not all gluten-free flours work the same way.
A commercial gluten-free all-purpose baking blend usually combines several flours and starches, sometimes with a binder such as xanthan gum. This makes it a convenient starting point for recipes originally designed to use wheat flour.
Almond flour contains more fat and less starch than many grain-based flours, so it produces a different texture. Oat flour absorbs moisture and can create a hearty, soft crumb, but it needs a carefully balanced recipe to prevent a dense or gummy center.
For the most predictable results, use the flour specified for the version you choose rather than swapping flours cup for cup.
2. Not Using Ripe Enough Bananas
Bananas are one of the most important ingredients in moist banana bread.
As bananas ripen, their starches convert into sugars, making the fruit sweeter and softer. Very ripe bananas also mash easily and blend smoothly into the batter.
Look for bananas with plenty of brown speckles or mostly brown skins. The fruit should be soft and fragrant, without signs of mold or fermentation.
Firm, yellow bananas generally provide less sweetness and can produce a less flavorful loaf.
3. Adding Too Much Flour
Measuring gluten-free flour incorrectly is an easy way to dry out banana bread.
Scooping flour directly from a bag can pack more flour into a measuring cup than the recipe requires. The resulting batter may become thick and heavy, leaving the baked loaf dry.
For consistent results, weigh the flour using a kitchen scale. If you’re using measuring cups, spoon the flour into the cup and level it gently.
4. Overbaking the Loaf
Banana bread needs enough time in the oven to set in the middle, but leaving it in too long causes moisture to evaporate.
Gluten-free loaves can be particularly tricky because the center may take longer to set than the crust takes to brown.
Check the bread near the end of the suggested baking time. A toothpick inserted into the center should come out clean or with a few moist crumbs, not wet batter.
5. Cutting the Bread Too Soon
Freshly baked gluten-free banana bread continues to set as it cools.
Cutting into it immediately can cause the slices to crumble or appear gummy, even when the loaf is properly baked.
Allow the bread to rest in the pan briefly, then transfer it to a cooling rack. Let it cool substantially before slicing.
The Three Methods: Which Gluten-Free Flour Works Best?
The best method depends on the texture you prefer and the ingredients you have available.

Method 1: Gluten-Free All-Purpose Flour
Best for a classic banana bread texture
A familiar, tender crumb with a soft center and lightly golden crust. This is the best starting point if you want banana bread that resembles the traditional version.

Method 2: Almond Flour
Best for a rich, tender texture
Almond flour adds natural fat and a subtle nutty flavor. The result is moist and delicate, although the loaf will be denser and more fragile than the all-purpose flour version.

Method 3: Oat Flour
Best for a hearty, soft crumb
Oat flour gives banana bread a mild, wholesome flavor. It can be tender and moist, but the batter needs enough binding and careful baking to prevent a gummy center.
These are three recipe variations based on how the flours behave, rather than a claim that a controlled baking experiment was conducted. Actual results will vary with banana size, flour brands, oven accuracy, and the moisture content of the ingredients.
Method 1: Classic Gluten-Free Banana Bread with All-Purpose Flour
This is the version to try first if you want a dependable loaf with a familiar banana bread texture.
Ingredients
- 2 cups (about 280 g) gluten-free all-purpose baking flour blend
- 3 medium very ripe bananas, mashed (about 300 g peeled)
- 2 large eggs, at room temperature
- 1/2 cup (100 g) packed brown sugar
- 1/3 cup (75 ml) neutral oil or melted butter
- 1/4 cup (60 g) plain yogurt
- 1 teaspoon vanilla extract
- 1 teaspoon baking soda
- 1 teaspoon baking powder
- 1/2 teaspoon ground cinnamon
- 1/2 teaspoon salt
- 1/2 cup (60 g) chopped walnuts or chocolate chips, optional
Choose a gluten-free baking blend intended for cakes or quick breads. If the blend already contains xanthan gum, follow the manufacturer’s guidance rather than automatically adding more.
Instructions
Step 1: Prepare the oven and pan.
Preheat the oven to 350°F (175°C). Grease a standard 9-by-5-inch loaf pan and line it with parchment paper, leaving a little overhang to help lift the bread out later.
Step 2: Mash the bananas.
Mash the bananas in a large bowl with a fork until mostly smooth. A few small lumps are fine.
Measure the mashed bananas if possible. Using too much fruit can make the center overly wet, while using too little can reduce moisture.
Step 3: Mix the wet ingredients.
Add the eggs, brown sugar, oil or melted butter, yogurt, and vanilla. Whisk until everything is well combined.
The yogurt adds moisture and a little acidity, which helps balance the sweetness of the bananas.
Step 4: Combine the dry ingredients.
In a separate bowl, whisk together the gluten-free flour, baking soda, baking powder, cinnamon, and salt.
This step distributes the leavening agents evenly, helping the loaf rise more consistently.
Step 5: Make the batter.
Add the dry ingredients to the banana mixture. Stir gently with a spatula until no dry pockets of flour remain.
Fold in the walnuts or chocolate chips if using. Avoid vigorous mixing, which can make the batter difficult to handle and may contribute to a less pleasant texture.
Step 6: Bake.
Pour the batter into the prepared loaf pan and smooth the top.
Bake for approximately 50–65 minutes. Begin checking around the 45-minute mark, as ovens and flour blends vary.
If the top browns too quickly while the center is still wet, loosely cover the loaf with foil for the remainder of baking.
Step 7: Check for doneness.
Insert a toothpick into the center. It should come out clean or with a few moist crumbs, without raw batter.
If you use a thermometer, the center should generally reach around 200–205°F (93–96°C) for a fully set quick bread, although the appropriate endpoint depends on the recipe and ingredients.
Step 8: Cool before slicing.
Let the loaf rest in the pan for 10–15 minutes, then transfer it to a wire rack.
Allow it to cool substantially before slicing so the crumb has time to set.
Why This Method Works
The flour blend supplies structure, while bananas, oil or butter, and yogurt help keep the bread moist. Eggs provide additional binding, making this the most straightforward option for beginners.
For the closest texture to traditional banana bread, start with this version and use the exact flour blend consistently.
Method 2: Moist Almond Flour Banana Bread
Almond flour is a useful alternative for people who want a grain-free banana bread with a rich, tender texture.
Because almond flour behaves differently from grain-based flour, this version uses its own ingredient ratios. It is not a direct substitution for the all-purpose flour recipe.
Ingredients
- 2 cups (about 200 g) finely ground blanched almond flour
- 3 medium ripe bananas, mashed (about 300 g peeled)
- 3 large eggs
- 1/4 cup (60 ml) maple syrup
- 2 tablespoons melted coconut oil or butter
- 1 teaspoon vanilla extract
- 1 teaspoon baking soda
- 1 teaspoon ground cinnamon
- 1/4 teaspoon salt
- 1/3 cup (40 g) chopped walnuts, optional
Instructions
Step 1: Preheat the oven.
Set the oven to 350°F (175°C). Grease and line a standard loaf pan with parchment paper.
Step 2: Mash the bananas.
Mash the bananas in a large mixing bowl until mostly smooth.
Step 3: Add the wet ingredients.
Whisk in the eggs, maple syrup, melted coconut oil or butter, and vanilla until well combined.
Step 4: Mix the dry ingredients.
In a separate bowl, combine the almond flour, baking soda, cinnamon, and salt.
Step 5: Combine the batter.
Add the dry mixture to the wet ingredients and stir until evenly combined. Fold in the walnuts if desired.
The batter will generally be thicker than a traditional wheat-flour banana bread batter, but it should still be spoonable.
Step 6: Bake until set.
Transfer the batter to the prepared loaf pan and smooth the top.
Bake for approximately 45–60 minutes. Check the center carefully because almond flour can brown on the outside before the loaf is fully set inside.
Cover loosely with foil if the top is getting too dark.
Step 7: Cool completely.
Allow the loaf to cool in the pan for 15 minutes, then transfer it to a rack.
Almond flour banana bread is particularly delicate while warm, so let it cool completely before slicing.
Why This Method Works
Almond flour naturally contains fat, which contributes to a rich mouthfeel. The eggs help bind the ingredients, while bananas add sweetness and moisture.
This version is naturally grain-free when the ingredients are pure and uncontaminated, but it is not suitable for anyone with an almond or tree-nut allergy.
Its texture will be more delicate and less springy than the all-purpose flour version. If you want a classic sandwich-like slice, the first method is usually a better choice.
Method 3: Soft and Hearty Oat Flour Banana Bread
Oat flour produces a banana bread with a gentle, nutty flavor and a soft, hearty crumb.
For a gluten-free diet, use oats and oat flour specifically labeled gluten-free. Ordinary oats can be contaminated with wheat, barley, or rye during processing.
Ingredients
- 2 cups (about 200 g) finely ground oat flour
- 3 medium ripe bananas, mashed (about 300 g peeled)
- 2 large eggs
- 1/3 cup (65 g) brown sugar
- 1/3 cup (75 ml) neutral oil
- 1/4 cup (60 g) plain yogurt
- 1 teaspoon vanilla extract
- 1 teaspoon baking powder
- 1/2 teaspoon baking soda
- 1 teaspoon ground cinnamon
- 1/2 teaspoon salt
- 1/3 cup (40 g) chopped walnuts or chocolate chips, optional
Instructions
Step 1: Prepare the pan.
Preheat the oven to 350°F (175°C). Grease and line a standard loaf pan.
Step 2: Mash the bananas.
Mash the bananas in a large bowl, leaving only a few small lumps.
Step 3: Whisk the wet ingredients.
Add the eggs, brown sugar, oil, yogurt, and vanilla. Whisk until smooth.
Step 4: Combine the dry ingredients.
In a separate bowl, whisk together the oat flour, baking powder, baking soda, cinnamon, and salt.
Step 5: Mix and rest the batter.
Stir the dry ingredients into the wet mixture until no dry flour remains.
Let the batter rest for about 5–10 minutes. Oat flour absorbs moisture as it sits, so this brief rest helps you see its final consistency before baking.
If the batter becomes extremely stiff, add a tablespoon of milk or yogurt. It should be thick but spoonable.
Step 6: Transfer to the pan.
Spread the batter evenly in the prepared loaf pan. Sprinkle the top with a few oats or chopped walnuts if desired.
Step 7: Bake.
Bake for approximately 45–60 minutes, checking for doneness toward the end of the baking time.
The center should be set and a toothpick should come out without wet batter. Avoid removing the loaf too early, because oat-based breads can appear baked on the outside while remaining gummy in the middle.
Step 8: Cool completely.
Rest the loaf in the pan for 10–15 minutes before transferring it to a wire rack.
Allow it to cool completely before slicing.
Why This Method Works
Oat flour absorbs moisture and contributes a hearty texture, while yogurt and oil help prevent the loaf from becoming dry. Eggs provide binding because oat flour does not form the same gluten-based structure as wheat flour.
This loaf will generally be less elastic than the all-purpose flour version, but it can be deliciously soft when the batter is properly balanced and the bread is fully baked.
Which Gluten-Free Banana Bread Should You Choose?
Here’s a quick comparison to help you decide.
| Feature | All-Purpose GF Flour | Almond Flour | Oat Flour |
|---|---|---|---|
| Texture | Soft and familiar | Rich and delicate | Hearty and tender |
| Flavor | Classic banana | Mildly nutty | Lightly nutty |
| Best for | Everyday baking | Grain-free baking | Oat-based baking |
| Main challenge | Flour blends vary | Fragile crumb | Can become gummy |
| Cooling needs | Cool before slicing | Cool completely | Cool completely |
My recommendation: Start with the all-purpose gluten-free flour version if your main goal is a soft, classic banana bread that slices neatly. Choose almond flour for a richer, grain-free alternative, or oat flour for a hearty loaf with a mild oat flavor.
These versions are recipe-based comparisons, not results from a documented three-way baking test. Your preferred version may depend on your flour brand, oven, and ideal texture.
Six Secrets to Keeping Gluten-Free Banana Bread Moist
No matter which flour you choose, these habits can improve the finished loaf.
1. Weigh Your Bananas
Banana size varies considerably. Three small bananas may provide much less fruit than three large ones.
Aim for approximately 300 g of peeled banana for each recipe above. This gives you a more consistent balance of moisture and flour.
2. Use Very Ripe Fruit
The best bananas are soft, fragrant, and heavily speckled. They contribute more sweetness and mash more smoothly than firm bananas.
Avoid fruit with mold, leaking skin, or signs of spoilage.
3. Don’t Add Extra Flour Too Quickly
Gluten-free batter can look different from traditional banana bread batter. Some blends absorb moisture more slowly, while others thicken quickly.
Follow the recipe and allow the batter to rest briefly when appropriate before deciding whether it needs additional liquid.
4. Choose Oil for a Softer Texture
Neutral oil remains liquid at room temperature, which can help banana bread feel soft even after cooling.
Butter provides a richer flavor, so either option can work. Choose based on your preference rather than assuming one is always better.
5. Avoid Overbaking
Begin checking the loaf before the estimated baking time ends.
If the top is darkening but the center is not ready, loosely cover it with foil. Removing the loaf when the center is properly set helps preserve moisture.
6. Store the Bread Properly
Once the loaf has cooled completely, wrap it tightly or place it in an airtight container.
Keep it at room temperature for about 2 days if your kitchen is cool and the loaf contains no ingredients requiring refrigeration. For longer storage, refrigerate it or freeze individual slices.
Easy Gluten-Free Banana Bread Variations
Once you’ve found your favorite base recipe, you can customize it with a few simple additions.
Chocolate Chip Banana Bread
Fold 1/2 cup of gluten-free chocolate chips into the batter before baking.
Chocolate pairs beautifully with ripe bananas and adds little pockets of sweetness throughout the loaf.
Walnut Cinnamon Banana Bread
Add 1/2 cup chopped walnuts and an extra pinch of cinnamon. The walnuts provide crunch, while cinnamon enhances the warm flavor of the bananas.
Blueberry Banana Bread
Fold in 1/2 cup fresh or frozen blueberries. If using frozen berries, add them straight from the freezer and fold gently to avoid staining the batter.
Extra fruit adds moisture, so check the center carefully and allow enough time for the loaf to bake through.
Coconut Banana Bread
Add 1/3 cup unsweetened shredded coconut. Coconut works particularly well with almond flour and can provide a subtle tropical flavor.
Dairy-Free Banana Bread
For the all-purpose flour and oat flour versions, use a plain dairy-free yogurt alternative and a suitable plant-based oil. Check the ingredients of your gluten-free flour blend and baking additions.
The almond flour version can also be made with coconut oil instead of butter, as specified.
Naturally Sweeter Banana Bread
If your bananas are extremely ripe, you may be able to reduce the added sugar slightly in the all-purpose flour or oat flour versions.
Make small adjustments rather than removing all the sugar at once, because sugar contributes to moisture and texture as well as sweetness.
How to Store and Freeze Gluten-Free Banana Bread
Proper storage helps preserve the soft texture you worked hard to achieve.
At room temperature: Once fully cooled, store the loaf in an airtight container for about 2 days in a cool kitchen.
In the refrigerator: Refrigerate in an airtight container for up to 4–5 days. Refrigeration can make some gluten-free breads feel firmer, so warm individual slices briefly before serving.
In the freezer: Slice the cooled loaf and freeze the slices in a single layer until firm. Transfer them to a freezer-safe bag or container and use within about 2–3 months for the best quality.
To reheat: Warm a slice in the microwave for about 10–20 seconds, or toast it gently. Add a little butter, nut butter, or yogurt if desired.
If the bread contains fresh fruit or other perishable additions, follow appropriate food-safety guidance and refrigerate it as needed.
Final Thoughts
Moist gluten-free banana bread is absolutely achievable when you choose a flour that suits your needs and pay attention to the balance between moisture and structure.
The all-purpose gluten-free flour version is the best starting point for a classic loaf with a soft crumb. Almond flour creates a richer, more delicate bread, while oat flour offers a hearty texture and mild flavor.
Whichever method you choose, remember the essentials: use ripe bananas, measure ingredients carefully, avoid overbaking, and let the loaf cool before slicing.
The next time you have a few overripe bananas on the counter, turn them into a loaf that is tender, flavorful, and easy to enjoy throughout the week. Serve a slice with coffee, spread it with peanut butter, or warm it slightly for a simple homemade treat.
Gluten-Free Banana Bread That Isn’t Dry (Tested Three Ways)
Ingredients
12 itemsInstructions
10 steps-
01
Preheat the oven to 350°F (175°C). Grease a 9-by-5-inch loaf pan and line it with parchment paper.
-
02
Mash the ripe bananas in a large bowl until mostly smooth.
-
03
Add the eggs, brown sugar, oil or melted butter, yogurt, and vanilla. Whisk until combined.
-
04
In a separate bowl, whisk together the gluten-free flour, baking soda, baking powder, cinnamon, and salt.
-
05
Add the dry ingredients to the wet ingredients and stir gently until no dry flour remains.
-
06
Fold in the walnuts or chocolate chips if using.
-
07
Pour the batter into the prepared loaf pan and smooth the top.
-
08
Bake for 50–65 minutes, checking toward the end of baking. Cover loosely with foil if the top browns too quickly.
-
09
Check that a toothpick inserted into the center comes out clean or with a few moist crumbs, without wet batter.
-
10
Let the loaf cool in the pan for 10–15 minutes, then transfer it to a wire rack. Cool substantially before slicing.
Chef's Notes & Tips
- Use approximately 300 g of peeled bananas for consistent results.
- Choose a gluten-free baking blend suitable for cakes or quick breads.
- If the blend already contains xanthan gum, follow its instructions rather than automatically adding more.
- Avoid overbaking, as this is one of the most common reasons gluten-free banana bread becomes dry.
- Store in an airtight container at room temperature for about 2 days, refrigerate for longer storage, or freeze slices for 2–3 months.
- For a dairy-free version, substitute a suitable dairy-free yogurt and use oil or a plant-based butter alternative.
- For anyone with celiac disease, check ingredient labels and cross-contact precautions carefully.