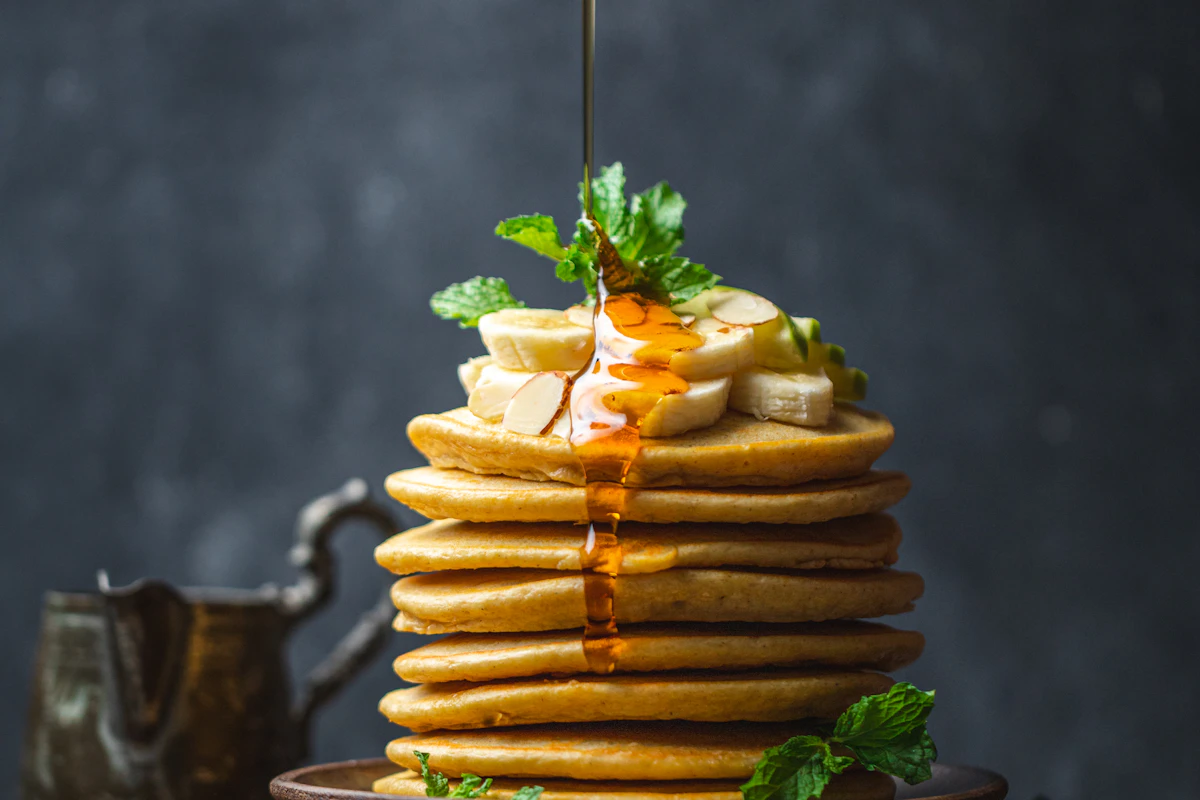
There is a singular weekend comfort in waking to the rhythmic sizzle of a griddle and the sweet, buttery aroma of pancakes wafting through the house. While boxed mixes have long dominated supermarket shelves, nothing compares to the pillowy height, golden-brown crust, and tender, melt-in-your-mouth crumb of homemade buttermilk pancakes prepared from scratch. With just a handful of staple ingredients you likely already have in your pantry, you can transform ordinary flour and butter into a towering stack of breakfast perfection.
The secret to true diner-style fluffiness lies in the scientific dance between real cultured buttermilk and leaveners. The natural lactic acid in buttermilk reacts vigorously with baking soda to create millions of tiny carbon dioxide bubbles that lift the batter into sky-high clouds as soon as it hits the hot cast iron. Combined with a gentle mixing hand and a splash of pure vanilla extract, this recipe guarantees the softest, most tender pancakes you have ever tasted.
Why You’ll Love These Fluffy Buttermilk Pancakes
Once you experience the difference genuine buttermilk makes, you will leave boxed pancake mixes behind for good. Here is why this recipe is an enduring household favorite:
- Incredible Cloud-Like Fluffiness: The double-leavening combination of baking powder and baking soda delivers towering thickness without heaviness.
- Tender, Velvety Crumb: Cultured buttermilk breaks down gluten strands, producing pancakes so soft you can cut them with a fork.
- Subtle Sweet & Tangy Flavor: A delicate balance of sweetness, rich melted butter, and a pleasant tang that prevents the pancakes from tasting cloying.
- Crispy Golden Edges: Cooking in melted butter or clarified butter on a properly preheated griddle creates that coveted lace-like golden rim.
- Freezer-Friendly Meal Prep: Make a double batch on Saturday morning, freeze individual stacks, and toast them straight from frozen on busy weekday mornings.
Ingredients You’ll Need
Using real butter, fresh leaveners, and authentic buttermilk is the foundation of exceptional breakfast baking.
Dry Ingredients
- All-Purpose Flour: Two cups of unbleached all-purpose flour. Spoon and level the flour into your measuring cup to avoid dense batter.
- Granulated Sugar: Two tablespoons to add just enough sweetness and promote beautiful browning against the griddle.
- Baking Powder: Two teaspoons for consistent, sustained oven-spring and rise.
- Baking Soda: One teaspoon to react immediately with the buttermilk acid, creating instantaneous volume.
- Fine Sea Salt: Half a teaspoon to balance the sweetness and elevate the rich butter flavor.
Wet Ingredients
- Cultured Buttermilk: Two full cups of whole-milk cultured buttermilk, at room temperature. The thicker the buttermilk, the fluffier your pancakes.
- Eggs: Two large eggs, lightly beaten, ideally at room temperature so they incorporate seamlessly.
- Unsalted Butter: Four tablespoons (half a stick) of unsalted butter, melted and allowed to cool slightly so it does not scramble the eggs.
- Pure Vanilla Extract: One teaspoon of real vanilla extract for a warm, fragrant aroma.
For the Griddle and Serving
- Butter for Griddling: Salted butter or neutral oil to grease the skillet between batches.
- Warm Pure Maple Syrup: Grade A amber or dark robust maple syrup, gently warmed in a small pitcher.
- Extra Butter: Softened salted butter for slathering generously between warm layers.
How to Make the Fluffiest Buttermilk Pancakes
Mastering pancake technique is all about griddle temperature control and handling the batter with care.
Step 1: Whisk the Dry Ingredients
In a large mixing bowl, whisk together the all-purpose flour, granulated sugar, baking powder, baking soda, and fine sea salt until thoroughly combined and free of lumps. Whisking aerates the dry mix for a lighter batter.
Step 2: Whisk the Wet Ingredients
In a separate medium bowl or large measuring cup, whisk together the cultured buttermilk, lightly beaten eggs, cooled melted butter, and pure vanilla extract until uniform.
Step 3: Combine with a Gentle Hand
Pour the wet buttermilk mixture into the dry flour bowl. Using a silicone spatula or wooden spoon, fold the ingredients together just until combined. Crucial Rule: Do not overmix! Stop stirring the moment the flour streaks disappear, even if visible lumps remain in the batter. Overmixing develops gluten and turns pancakes tough and rubbery.
Step 4: Rest the Batter
Let the batter rest undisturbed on the counter for 10 minutes. During this resting time, the leaveners will activate, sending hundreds of tiny bubbles through the thick batter. Do not stir it again after resting.
Step 5: Heat and Grease the Griddle
Preheat a heavy cast-iron skillet or nonstick electric griddle over medium heat until a droplet of water flicked onto the surface dances and evaporates in 2 seconds (around 350°F to 375°F). Lightly brush the surface with melted butter or a thin film of oil.
Step 6: Cook to Golden Perfection
Use a 1/3-cup measuring scoop to ladle batter onto the griddle, leaving two inches between each pancake. Cook undisturbed for 2 to 3 minutes, until the edges look set and bubbles appear on the top surface and begin to pop. Slide a thin spatula underneath and flip in one confident, swift motion. Cook the second side for another 1 to 2 minutes until golden brown and cooked through the center.
Step 7: Serve Fresh and Warm
Transfer warm pancakes immediately to plates, stack them high, crown with a generous pat of softened butter, and pour warm pure maple syrup cascading over the sides.
Tips for Fluffy Diner-Style Pancakes
- Leave the Lumps Alone: A smooth pancake batter is an overmixed pancake batter. Small lumps will hydrate and disappear completely as the pancakes bake on the hot griddle.
- Watch the Bubbles: Wait to flip until bubbles rise through the center and begin popping open, leaving small craters, while the edges appear matte and dry.
- Never Press Down: Never use your spatula to press down on the pancakes while cooking! Flattening them squeezes out the trapped air pockets and results in dense discs.
- Keep Batches Warm: If serving a crowd, place cooked pancakes in a single layer on a wire rack set over a baking sheet in a 200°F (95°C) oven while you finish the remaining batter.
Delicious Variations to Try
This classic master batter serves as the ultimate canvas for your favorite breakfast additions:
- Blueberry Pancakes: Drop fresh blueberries onto the tops of the batter immediately after ladling onto the griddle, before flipping.
- Chocolate Chip: Sprinkle semi-sweet mini chocolate chips over the uncooked side for gooey chocolate pockets throughout.
- Banana Pecan: Fold finely diced ripe bananas and toasted chopped pecans into the batter during the final two stirs.
- Lemon Ricotta: Fold in 1/2 cup of whole milk ricotta cheese and the grated zest of two fresh lemons for a bright Italian brunch spin.
How to Freeze and Reheat Pancakes
Buttermilk pancakes freeze exceptionally well, making morning breakfasts effortless:
- Freezing: Let leftover pancakes cool completely on a wire rack. Lay them in a single layer on a parchment-lined baking sheet and freeze for 1 hour until solid, then transfer into a zip-top freezer bag for up to 2 months.
- Reheating in a Toaster: Pop frozen pancakes directly into your toaster on medium setting for a warm, crispy-edged pancake in 2 minutes.
- Reheating in the Oven: Arrange frozen pancakes on a baking sheet, cover loosely with foil, and warm at 350°F (175°C) for 8 to 10 minutes.
Classic Fluffy Buttermilk Pancakes
Ingredients
12 itemsDry Mix
Wet Mix
For Cooking & Serving
Instructions
8 steps-
01
In a large mixing bowl, whisk together the flour, sugar, baking powder, baking soda, and fine sea salt until well combined.
-
02
In a separate bowl, whisk together the buttermilk, lightly beaten eggs, cooled melted butter, and vanilla extract.
-
03
Pour the wet ingredients into the dry ingredients. Using a spatula, fold together gently until just combined. Lumps should remain. Do not overmix.
-
04
Let the batter rest on the counter undisturbed for 10 minutes to activate leaveners.
-
05
Heat a large cast-iron skillet or non-stick griddle over medium heat (approx. 350°F). Brush lightly with butter.
-
06
Ladle 1/3-cup scoops of batter onto the hot surface. Cook for 2 to 3 minutes until bubbles form across the surface and pop, and edges look set.
-
07
Flip gently and cook for an additional 1 to 2 minutes until golden brown on both sides and cooked through the center.
-
08
Serve immediately with softened butter and warm pure maple syrup.