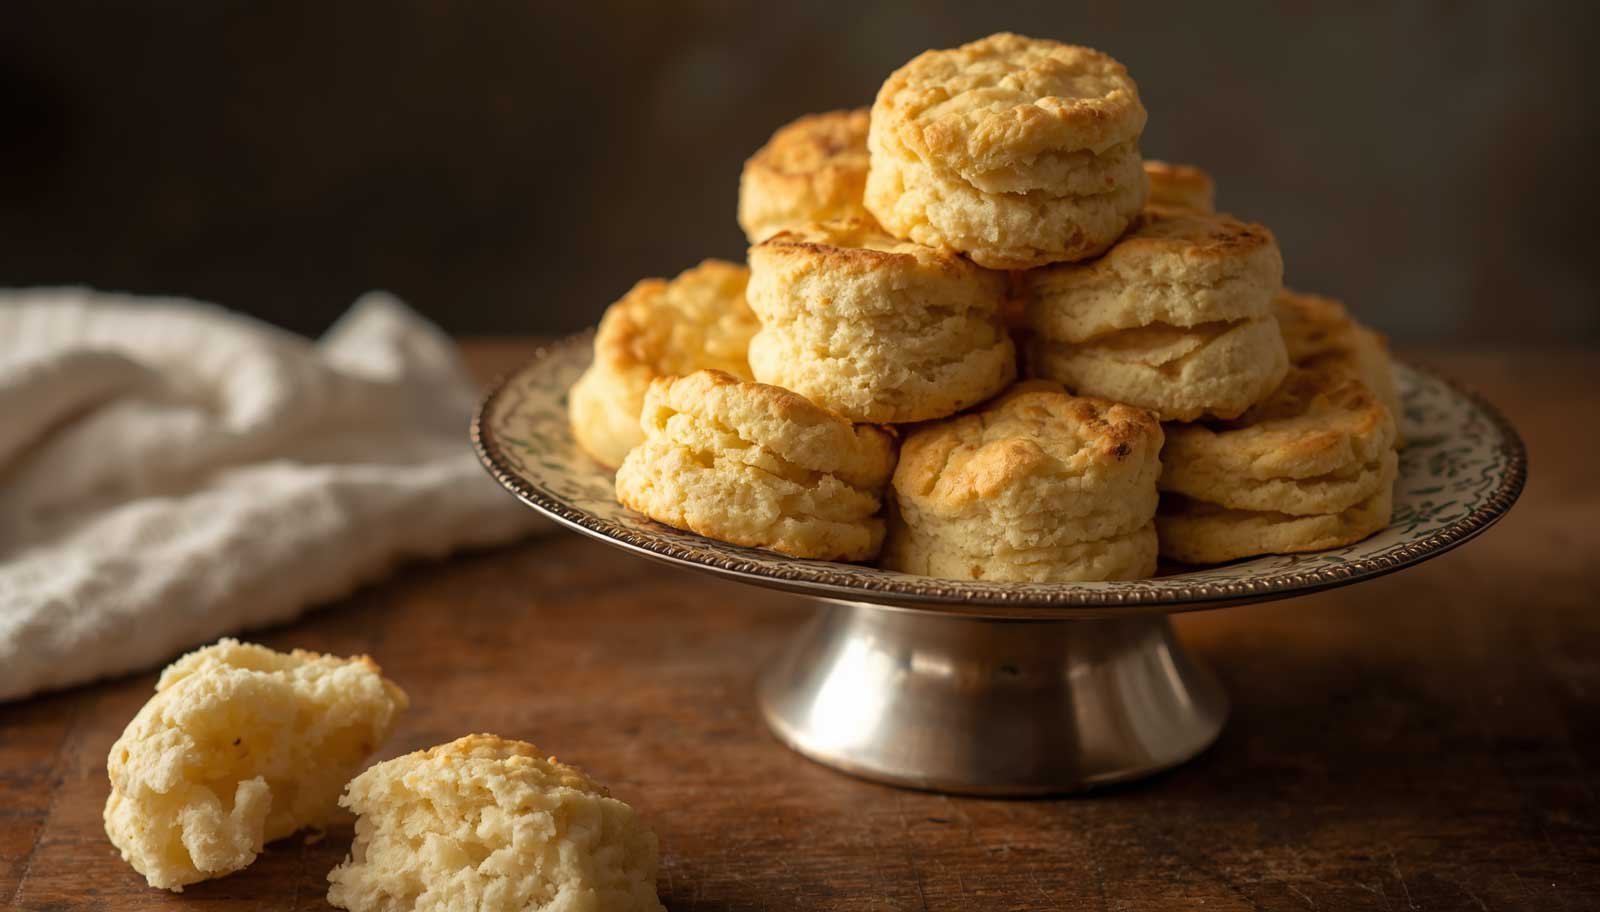
There is something wonderfully comforting about a basket of warm, homemade buttermilk biscuits fresh from the oven. With golden tops, soft centers, and delicate layers that pull apart easily, these classic biscuits are the kind of simple baked treat that makes breakfast feel special.
The best part? You don’t need a mixer, fancy baking equipment, or years of experience to make them. With a handful of everyday ingredients and a few simple techniques, you can bake fluffy buttermilk biscuits from scratch right in your own kitchen.
The secret lies in keeping the butter cold, handling the dough gently, and giving the biscuits enough room to rise. Once you understand these basics, you’ll be able to make tender, flaky biscuits that pair beautifully with butter and jam, creamy sausage gravy, scrambled eggs, or a bowl of warm soup.
This beginner-friendly guide walks you through every step, explains the common mistakes to avoid, and shares practical tips for getting bakery-style results at home.
Why You’ll Love These Homemade Buttermilk Biscuits
- Simple ingredients: You only need flour, buttermilk, butter, baking powder, baking soda, salt, and a little sugar.
- No special equipment: A mixing bowl, pastry cutter or fork, rolling pin, and baking sheet are enough.
- Fluffy and tender: Cold butter and gentle handling help create a soft interior with flaky layers.
- Ready in about 30 minutes: These biscuits are quick enough for weekend breakfast or a comforting weeknight side.
- Easy to customize: Add cheese, fresh herbs, garlic, or a touch of honey for different flavors.
- Beginner-friendly: The method is straightforward once you know what the dough should look and feel like.
What Makes Buttermilk Biscuits So Fluffy?
Fluffy biscuits depend on a combination of ingredients, temperature, and technique. Each component plays an important role.
Cold Butter Creates Flaky Layers
Butter is one of the most important ingredients in biscuit dough.
When cold butter is cut into the flour, it forms small pieces throughout the mixture. During baking, the butter melts and releases moisture, creating pockets that help separate the dough into tender, flaky layers.
If the butter becomes too warm before the biscuits go into the oven, the dough may spread more and produce a less distinct texture.
Beginner tip: Keep the butter refrigerated until you’re ready to use it. If your kitchen is warm, chill the cut biscuits for 10 minutes before baking.
Buttermilk Adds Tenderness and Flavor
Buttermilk provides moisture and a gentle tang that gives homemade biscuits their familiar flavor.
Its acidity also reacts with baking soda, helping release carbon dioxide that contributes to the biscuits’ rise. Combined with baking powder, it helps create a light texture.
Real cultured buttermilk is ideal, but you can make a quick substitute if needed.
Baking Powder and Baking Soda Help the Dough Rise
Baking powder provides much of the leavening needed to lift the dough in the oven.
Baking soda reacts with the acidity in buttermilk, contributing to the rise and helping the biscuits develop a golden color.
Measure these ingredients carefully. Too little can result in dense biscuits, while too much may leave an unpleasant aftertaste.
Gentle Mixing Keeps Biscuits Tender
Once flour becomes wet, gluten begins to develop. Some gluten is necessary to give the dough structure, but too much can make biscuits tough.
Mix just until the ingredients come together. The dough should look slightly rough rather than perfectly smooth.
A little stickiness and a few visible butter pieces are perfectly normal.
Ingredients You’ll Need
This recipe uses basic pantry ingredients and makes approximately 8 medium biscuits.
All-Purpose Flour
All-purpose flour provides structure without making the biscuits too dense. Measure it by weight if possible, or spoon it into your measuring cup and level it off instead of scooping directly from the bag.
Scooping can pack too much flour into the cup and make the dough dry.
Unsalted Butter
Use cold unsalted butter so you can control the amount of salt in the recipe. Cut it into small cubes or grate it using the large holes of a box grater.
Grated butter is especially convenient for beginners because it distributes easily through the flour.
Cultured Buttermilk
Use cold buttermilk for the best results. Its acidity helps the leavening agents work, while its moisture brings the dough together.
If you don’t have buttermilk, see the substitution tips below.
Baking Powder and Baking Soda
These ingredients help the biscuits rise and become light. Check that your baking powder is fresh, especially if it has been sitting in the cupboard for a long time.
Salt and Sugar
Salt balances the flavor, while a small amount of sugar adds a subtle sweetness and encourages browning. The biscuits will still taste savory rather than dessert-like.
How to Make Fluffy Buttermilk Biscuits Step by Step
The following method is designed for beginners. Read through the steps before starting so you can work efficiently while keeping the ingredients cold.
Step 1: Preheat the Oven
Preheat your oven to 425°F (220°C).
Line a baking sheet with parchment paper. You can also lightly grease the sheet if you don’t have parchment.
A properly preheated oven is important because the initial burst of heat helps the biscuits rise quickly and develop golden tops.
Step 2: Combine the Dry Ingredients
In a large mixing bowl, whisk together:
- 2 cups (250 g) all-purpose flour
- 1 tablespoon baking powder
- 1/2 teaspoon baking soda
- 1 teaspoon salt
- 1 tablespoon granulated sugar
Whisking distributes the leavening agents evenly through the flour, helping the biscuits rise consistently.
Step 3: Cut in the Cold Butter
Add 6 tablespoons (85 g) of cold, unsalted butter, cut into small cubes.
Use a pastry cutter, two forks, or your fingertips to work the butter into the flour. Stop when the mixture resembles coarse crumbs, with some butter pieces roughly the size of small peas.
Do not try to make the mixture completely uniform. Visible pieces of butter help create a flaky texture.
If the butter begins to soften noticeably, place the bowl in the refrigerator for a few minutes before continuing.
Step 4: Add the Buttermilk
Pour in 3/4 cup (180 ml) cold buttermilk.
Use a fork or spatula to stir gently until a shaggy dough forms. Some dry flour may remain at the bottom of the bowl initially, so scrape the sides and fold the mixture together.
If the dough is still very dry and won’t hold together, add another teaspoon or two of buttermilk as needed.
Avoid pouring in extra liquid all at once. The dough should be moist and slightly tacky, not wet like cake batter.
Step 5: Bring the Dough Together
Lightly flour your work surface and turn the dough out onto it.
Gently press the dough together with your hands. Pat it into a rough rectangle about 3/4 to 1 inch thick.
The dough may look uneven, and that’s fine. You don’t need to knead it until smooth.
If it feels sticky, dust your hands and the work surface lightly with flour. Adding too much flour can make the finished biscuits dry.
Step 6: Fold the Dough to Create Layers
This simple step helps create flaky biscuits.
Fold one side of the dough toward the center, then fold the other side over it, similar to folding a letter. Gently pat it back into a rectangle.
Repeat this folding process two or three times, keeping your movements light and quick.
Each fold creates layers in the dough. Avoid pressing so hard that you squeeze out all the air or warm the butter with excessive handling.
Step 7: Cut Out the Biscuits
Pat the dough to approximately 3/4 to 1 inch thick.
Use a 2- to 2 1/2-inch biscuit cutter to cut out the biscuits. Press the cutter straight down without twisting it.
Twisting can seal the edges of the dough and make it harder for the biscuits to rise evenly.
Gather the scraps gently, press them together, and cut out additional biscuits. The last biscuits may be slightly less tender because the dough has been handled more.
Step 8: Arrange the Biscuits on the Baking Sheet
Place the biscuits on the prepared baking sheet.
For biscuits with soft sides, arrange them close together so they touch lightly. For crispier sides, leave about an inch of space between them.
If the dough has become warm while cutting, refrigerate the biscuits for about 10 minutes before baking.
Step 9: Bake Until Golden
Bake for approximately 12 to 16 minutes, depending on their size and your oven.
The tops should be lightly golden, and the biscuits should look risen and set. If your oven browns unevenly, rotate the baking sheet near the end of baking.
Avoid opening the oven repeatedly during the first part of baking because the temperature drop can interfere with rising.
Step 10: Finish and Serve Warm
Remove the biscuits from the oven and brush the tops with a little melted butter if desired.
Let them rest for a few minutes before serving. Split them open and enjoy them while warm, when the centers are soft and the layers are easiest to pull apart.
Serve with butter and jam, honey, scrambled eggs, or creamy gravy.
Tips for the Fluffiest Homemade Biscuits
A few small details can make a big difference in the final texture.
Keep the butter cold. Cold butter is easier to work into the flour and helps create flaky layers. If your kitchen is warm, chill the dough before cutting or baking.
Use fresh leavening agents. Old baking powder may not provide enough lift. Replace it if it has passed its expiration date or seems ineffective.
Avoid overworking the dough. Mix only until the ingredients come together, and handle the dough gently during folding and cutting.
Don’t use too much flour on the work surface. A light dusting prevents sticking, but excess flour can make the biscuits dry and heavy.
Cut straight down. Press the biscuit cutter down firmly without twisting to help the edges rise freely.
Bake in a fully preheated oven. A hot oven helps the butter release steam and gives the biscuits an initial lift.
Use the right dough thickness. Dough that is too thin produces flatter biscuits. Aim for about 3/4 to 1 inch thick before cutting.
Common Biscuit Problems and How to Fix Them
Why Did My Biscuits Turn Out Dense?
Dense biscuits often result from too much flour, overmixing, insufficient leavening, or dough that was rolled too thin.
Measure the flour carefully, check the freshness of your baking powder, and mix the dough only until it comes together.
Why Didn’t My Biscuits Rise?
Several things can prevent biscuits from rising properly:
- Baking powder that has lost its effectiveness
- Dough that was handled too heavily
- A cutter twisted during cutting
- Dough rolled too thin
- An oven that wasn’t fully preheated
Follow the measurements closely and handle the dough gently for better results.
Why Are My Biscuits Dry?
Too much flour or too little buttermilk can make biscuits dry and crumbly. Overbaking can also remove too much moisture.
If the dough won’t hold together, add buttermilk gradually, one teaspoon at a time. Remove the biscuits once the tops are golden and the centers are baked through.
Why Did My Biscuits Spread Instead of Rising?
Warm butter is a common cause. If the butter melts before the biscuits enter the oven, the dough may spread instead of holding its shape.
Chill the cut biscuits briefly and make sure the oven is hot before baking.
Why Are the Bottoms Too Dark?
Dark baking sheets can brown biscuit bottoms quickly. Try using a lighter-colored baking sheet, lining it with parchment, or moving the tray to a higher oven rack if your oven consistently overbrowns the bottoms.
Easy Variations to Try
Once you’re comfortable with the basic recipe, you can change the flavor with a few simple additions.
Cheddar Buttermilk Biscuits
Fold 3/4 cup of shredded sharp cheddar cheese into the dry ingredients before adding the buttermilk. A little black pepper or chopped chives makes a delicious addition.
Serve these biscuits with soups, chili, or scrambled eggs.
Garlic and Herb Biscuits
Add 1 teaspoon of garlic powder and 1 tablespoon of finely chopped fresh herbs, such as parsley or chives, to the dry ingredients.
Brush the baked biscuits with melted butter mixed with a little minced garlic and parsley for extra flavor.
Honey Butter Biscuits
Keep the basic recipe as written, then brush the warm biscuits with a mixture of 2 tablespoons melted butter and 1 teaspoon honey.
This variation is delicious with breakfast, fruit, or a cup of tea.
Whole-Wheat Buttermilk Biscuits
Replace up to 1/2 cup of the all-purpose flour with whole-wheat flour. You may need a little extra buttermilk because whole-wheat flour absorbs more moisture.
The biscuits will have a heartier texture and a slightly nutty flavor.
Pepper and Chive Biscuits
Add freshly ground black pepper and 1 to 2 tablespoons of chopped chives to the dry ingredients. These savory biscuits pair particularly well with eggs, creamy soups, and roasted vegetables.
What to Serve with Buttermilk Biscuits
Homemade biscuits are versatile enough for breakfast, brunch, dinner, and even dessert.
- Butter and strawberry jam: A classic sweet pairing for warm biscuits.
- Honey butter: Adds a simple, sweet finish.
- Sausage gravy: Turn the biscuits into a comforting Southern-style breakfast.
- Scrambled or fried eggs: Make a hearty breakfast sandwich with cheese and herbs.
- Chicken soup: Serve a warm biscuit alongside a bowl of homemade soup.
- Chili: Use biscuits to soak up the rich sauce.
- Fried chicken: Buttermilk biscuits are a natural partner for a savory Southern-inspired meal.
- Fresh berries and whipped cream: Split the biscuits and use them as the base for a simple biscuit-style shortcake.
For a relaxed weekend brunch, serve the biscuits with scrambled eggs, fresh fruit, butter, and a selection of jams.
How to Store, Freeze, and Reheat Biscuits
Homemade biscuits taste best fresh from the oven, but you can store them for later.
Storing at Room Temperature
Allow the biscuits to cool completely, then place them in an airtight container. Store at room temperature for up to 2 days.
Avoid sealing them while still warm, as trapped steam can make their crusts soft.
Refrigerating Leftovers
Refrigeration is generally unnecessary for plain biscuits and can make them stale more quickly. However, biscuits containing perishable fillings should be refrigerated promptly.
Freezing Baked Biscuits
Let the biscuits cool completely, then freeze them in a freezer-safe container or bag for up to 2 to 3 months for the best quality.
Reheat from frozen in a 325°F (165°C) oven for approximately 10 to 15 minutes, or until warmed through. Cover loosely with foil if the tops begin browning too much.
Freezing Unbaked Biscuits
You can also freeze the cut, unbaked biscuits on a baking sheet until firm, then transfer them to a freezer-safe bag.
Bake from frozen in a preheated 425°F (220°C) oven, adding several minutes to the baking time as needed. Check that the centers are fully baked before serving.
This is a convenient way to have homemade biscuits ready for a weekend breakfast without preparing the dough from scratch every time.
How to Make Buttermilk If You Don’t Have Any
If you open the refrigerator and discover that you’re out of buttermilk, you can make a quick substitute.
Add 1 tablespoon of lemon juice or white vinegar to a measuring cup, then pour in enough milk to reach 1 cup. Stir and let it stand for 5 to 10 minutes.
For this recipe, measure out 3/4 cup of the prepared mixture.
This substitute adds acidity and moisture, although the flavor and thickness may differ slightly from cultured buttermilk. Full-fat milk generally produces a richer result than very low-fat milk.
Final Thoughts
Fluffy buttermilk biscuits from scratch are easier to make than they might seem. You don’t need complicated equipment or advanced baking skills. The real secret is keeping the butter cold, measuring the ingredients accurately, and handling the dough gently.
Once you’ve made this recipe a few times, you’ll learn to recognize the ideal dough texture and find the technique that works best in your kitchen. You can keep the biscuits classic or experiment with cheddar, herbs, garlic, and honey butter.
Bake a batch for breakfast, serve them with a bowl of soup, or enjoy one warm with a little butter and jam. Simple, homemade, and wonderfully comforting, these biscuits are a recipe worth keeping close.
Fluffy Buttermilk Biscuits from Scratch
Ingredients
8 itemsInstructions
10 steps-
01
Preheat the oven to 425°F (220°C). Line a baking sheet with parchment paper.
-
02
In a large bowl, whisk together the flour, baking powder, baking soda, salt, and sugar.
-
03
Add the cold butter and cut it into the flour using a pastry cutter or fork until the mixture resembles coarse crumbs with some pea-sized butter pieces remaining.
-
04
Pour in the buttermilk and stir gently until a shaggy dough forms. Add a little extra buttermilk if the dough is too dry to hold together.
-
05
Turn the dough onto a lightly floured surface. Gently press it into a rectangle about 3/4 to 1 inch thick.
-
06
Fold the dough like a letter, pat it back into a rectangle, and repeat two or three times to create layers.
-
07
Cut out 8 biscuits using a 2- to 2 1/2-inch cutter, pressing straight down without twisting. Gently gather any scraps to make additional biscuits if needed.
-
08
Arrange the biscuits on the prepared baking sheet, placing them close together for softer sides or farther apart for crisper sides.
-
09
Bake for 12 to 16 minutes, until risen and lightly golden on top.
-
10
Brush with melted butter if desired. Let rest for a few minutes, then serve warm.
Chef's Notes & Tips
- Keep the butter and buttermilk cold for the flakiest texture.
- Avoid overmixing or kneading the dough.
- If the dough becomes warm, chill the cut biscuits for about 10 minutes before baking.
- For a savory variation, add shredded cheddar or chopped fresh herbs.
- Store cooled biscuits in an airtight container at room temperature for up to 2 days.
- Freeze baked or unbaked biscuits for longer storage.